


A practical guide for SmartShade owners, with or without a SmartBridge
There’s a quiet moment, somewhere in the middle of a move, when you stop unpacking and look up at the windows. You’ve been pulling the shades by hand for a week. The schedule that used to run on its own at the old place is technically still running, you just don’t have anywhere to install it yet.
If you’re a SmartShade owner moving to a new home, you’ve probably already wondered how much of this you’re going to have to redo. The answer, encouragingly, is: less than you think. Not nothing—but much less than starting from scratch.
Here’s what actually happens when you bring your SmartShades to a new address.
First, the Good News: Most of Your Setup Comes With You
If your SmartShades are still showing up in your RYSE app, almost everything you’ve built is intact. Your routines. Your schedules. Your room groupings. Your device names. Your shared access if your partner or roommate has the app installed. Your login. None of it has to be reconstructed from scratch.
The shades themselves don’t need a factory reset just because they moved buildings. The official guidance from RYSE support is that you only consider a factory reset if you specifically want a “like new” state or you’re troubleshooting connection issues. If everything was working before, skip the reset entirely. Mount, power, reconnect, done.
That’s the foundation. Now here’s what needs attention.
If You Use a SmartBridge
The SmartBridge is what makes routines, schedules, and Alexa/Google/HomeKit integrations work. When you move, the Bridge needs to be reconnected to your new Wi-Fi network. This is the single most important step, without it, your schedules can’t run.
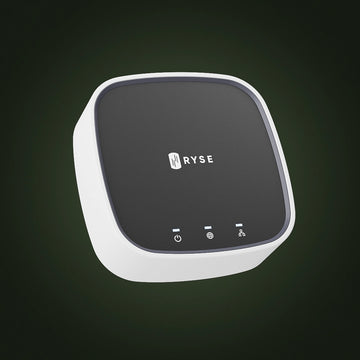
Step 1: Plug the Bridge in at the new place
Place the SmartBridge near your new router and within roughly 30 to 40 feet of where your SmartShades will be installed. Plug it in to power.
Step 2: Reconnect to the new Wi-Fi
In the RYSE app: SmartBridge Settings → Wi-Fi Connection → select your new Wi-Fi network → enter the password → Connect. If you’re using ethernet to set it up first, you can plug it into your router with the cable, then unplug the cable so it switches over to Wi-Fi.
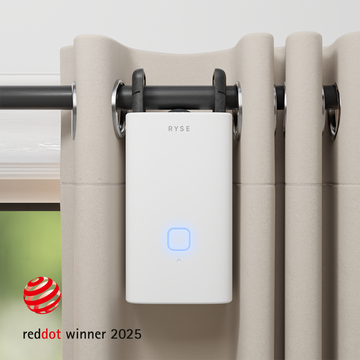
Step 3: Wait for all three blue LEDs to go solid
This is how you know the Bridge is online. If only the left LED is on, the Wi-Fi connection didn’t complete, run through the connection steps again.
The Bridge does not lose your devices when you move. As long as it comes back online on the new network, your existing SmartShades, routines, and schedules should reconnect to it automatically.
If You’re Using Bluetooth Only
If you don’t have a SmartBridge and your SmartShades are paired directly to your phone over Bluetooth, the move is even simpler. There’s no network reconnection step, because the connection is between your phone and the device itself. Reinstall the SmartShade on the new chain, reset the open and close positions in the app, and you’re running.
Worth noting: without a SmartBridge, you’ll still have all your previous device names and any local settings, but you will not have access to the routines feature. If you’ve been considering adding a SmartBridge to your setup anyway, a move is a natural moment to add it.
Mounting at the New Place: A Few Things to Check
New windows means a new install. The product itself is the same as before, but the shades may not be. Spend a minute looking at your new shades before you start drilling or taping anything.
Check 1: Which way does the chain hang?
Look at how the chain hangs relative to the wall. Is it parallel to the wall on the inside of the window frame, parallel on the outside of the frame, or coming straight out from the frame (perpendicular)? The mounting method depends on this. The in-app install guide has a specific path for each.
Check 2: Is there room for the device?
Wherever you mount the bracket, the SmartShade needs clearance so the shade doesn’t hit the SmartShade when it operates. The chain or cord should run straight through the device without rubbing against anything. If there’s not enough space inside the frame, the in-app guide will walk you through using an extension bracket on the wall.
Check 3: Screws or tape?
Screws (the default) work on drywall, plaster, and wood. Mark the wall with the chain held taut “like a guitar string,” leaving at least 8 inches of space below the mark for the device. Tape works well for metal frames or situations where drilling isn’t an option. It’s not recommended for brick or cement. If you’re using extension brackets with adhesive, give them 24 hours to cure before loading the device on.
Check 4: Power
Decide whether you’re using the Power Adapter or the BatteryPack at the new place. If BatteryPack, charge it fully before mounting (the LED turns green when it’s ready). If Adapter, make sure the new outlet location works with the cable length.
The One Step Almost Everyone Forgets
Your shades are on the wall. The Bridge is online. The app sees your devices. Everything looks like it should be working. You tap “open” in the app and the shade moves—but it stops in the wrong place.
This is the position reset. The SmartShade remembers where the top and bottom were at the old place, and your new windows are almost certainly a different size. For each shade, go into its settings in the app and re-set the top (open) and bottom (closed) positions to match the new window.
It’s a 30-second step per shade. It’s also the most commonly missed one when people are rushing through reinstall.
If Something Isn’t Working
Most issues after a move come down to one of three things. Walk through them in this order:
Is the SmartBridge online?
All three blue LEDs should be solid. If they’re not, the Bridge didn’t complete its Wi-Fi reconnection. Run the connection steps again.
Does the app see the shade?
Open the dashboard and check whether the shade is listed. If it’s listed and you tap to open it but nothing moves, the shade may need to be re-paired to the SmartBridge. Use “Pair SmartShade via SmartBridge” in the app and press the PAIR button on top of the SmartShade when prompted.
Are the positions still set to the old window?
If the shade moves but stops in the wrong place, that’s the position reset issue from the previous section. Re-set top and bottom in the app.
Only consider a factory reset if you’ve worked through the above and something’s still off. To factory reset, find the small pinhole above the STOP button on top of the SmartShade and press it with a pen or paperclip for a few seconds. The lights will flash red, then blue, then go solid blue. After that you’ll need to re-calibrate positions and re-add the shade to the app.
The Bottom Line
Moving with SmartShades is one of the few parts of moving that doesn’t require starting over. The hardware comes with you. The app comes with you. The routines come with you. The only thing that’s genuinely new is the windows themselves.
Reconnect the Bridge to the new Wi-Fi. Mount the shades on the new windows. Re-set the open and close positions. The schedule that ran every morning at the old place starts running every morning at the new one, with the same name, the same time, the same gradual fill of light.
Same shades, same app, same login. Different windows.


